This post will not be for everyone who signs up for InstantCard as most of our clients go through our website to create and order cards. This post is more handy for designers being tasked with the responsibility of creating the artwork for their company’s ID badges as well as for those designers who will be creating all of their ID badges in Illustrator and sending them to us to print as PDFs.
Creating a New Document
If you have not yet created your artwork or made up the ID cards for your company then you will want to follow the steps outlined here.

The screenshot above is how you will want to set up your document. For my purposes I only needed 2 ID badges with front and back designs. So, the first thing I did was set up the number of artboards I knew I would need – 4. Artboard 1 would be for the front of the first card, Artboard 2 would be the back of the first card, Artboard 3 would be the front of the second card, and Artboard 4 would be the back of the second card. This is the most efficient way to set it up if you were going to make your ID cards yourself using Illustrator. The default spacing between each board is 20px which I was fine with and I had them span out in one line going to the right; however, you do not have to do it that way. You can use any layout variation that works best for you as long as the front design is the first board followed by the back design as the next board in the sequence and so on. As long as your cards need a back there should never be two fronts next to each other or two backs together.
Please note when creating your own artwork to set up your document in RGB, not CMYK. This is just for InstantCard and how our specific printers work.
Adding Artboards to Existing Documents
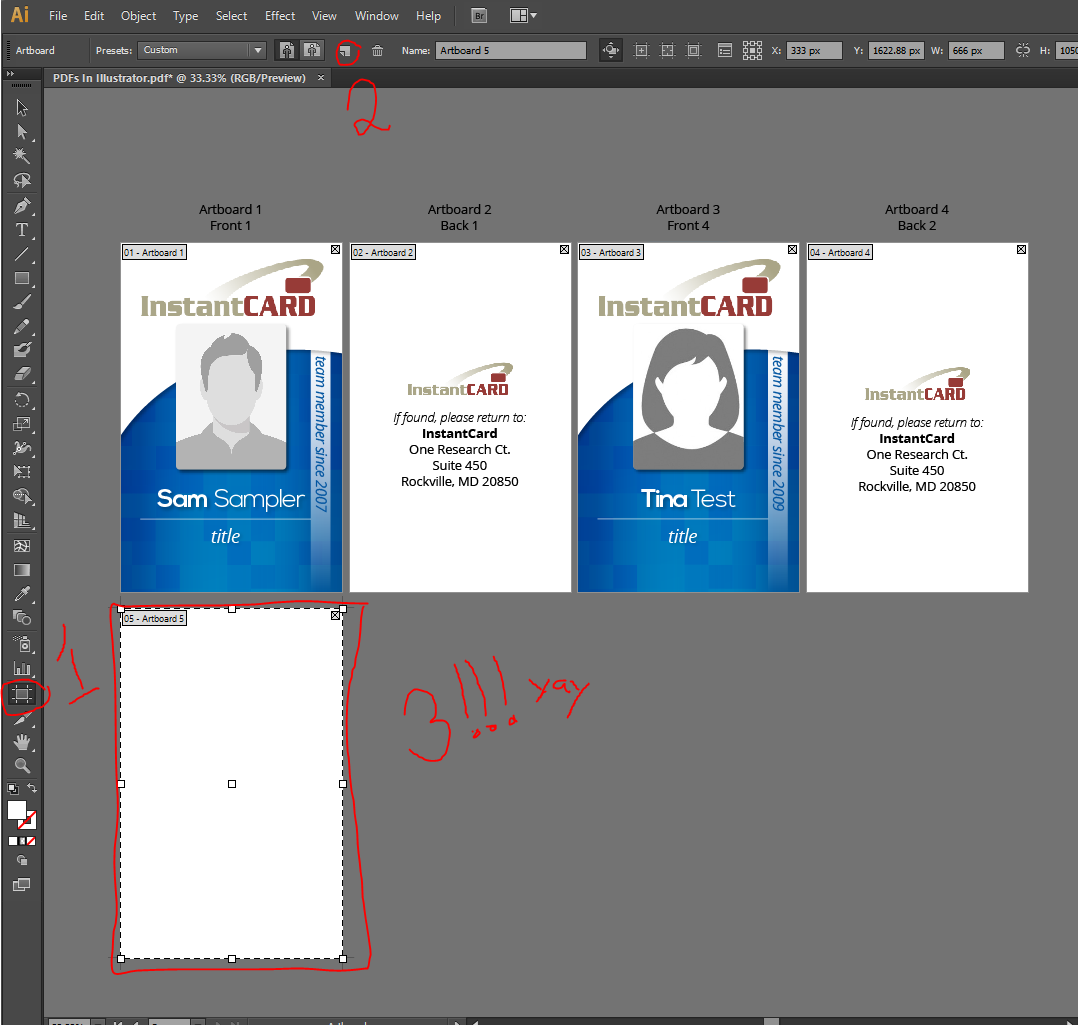
Say you already started your design before seeing this blog post or you started off with the incorrect number of boards and realized you needed to add more. This is a quick tip on how to do that without choosing “Artboard Tool” on the left hand side and then drawing it out or manually entering in the height and width. We’re busy people and these extra steps are time consuming! The fastest way to add a new, blank artboard is to choose the “Artboard Tool” on the left hand side and going to the top of your screen to the little paper icon and clicking that. This is the “New Artboard” icon and it’s wonderful. After clicking it you will bring your mouse down to the work area and wa-la! There is the new artboard following your cursor in the exact size it needs to be. All you have to do is line it up with your others and right click to place it! I have a screenshot below because, well, who doesn’t love screenshots?
The artwork is created, now what?
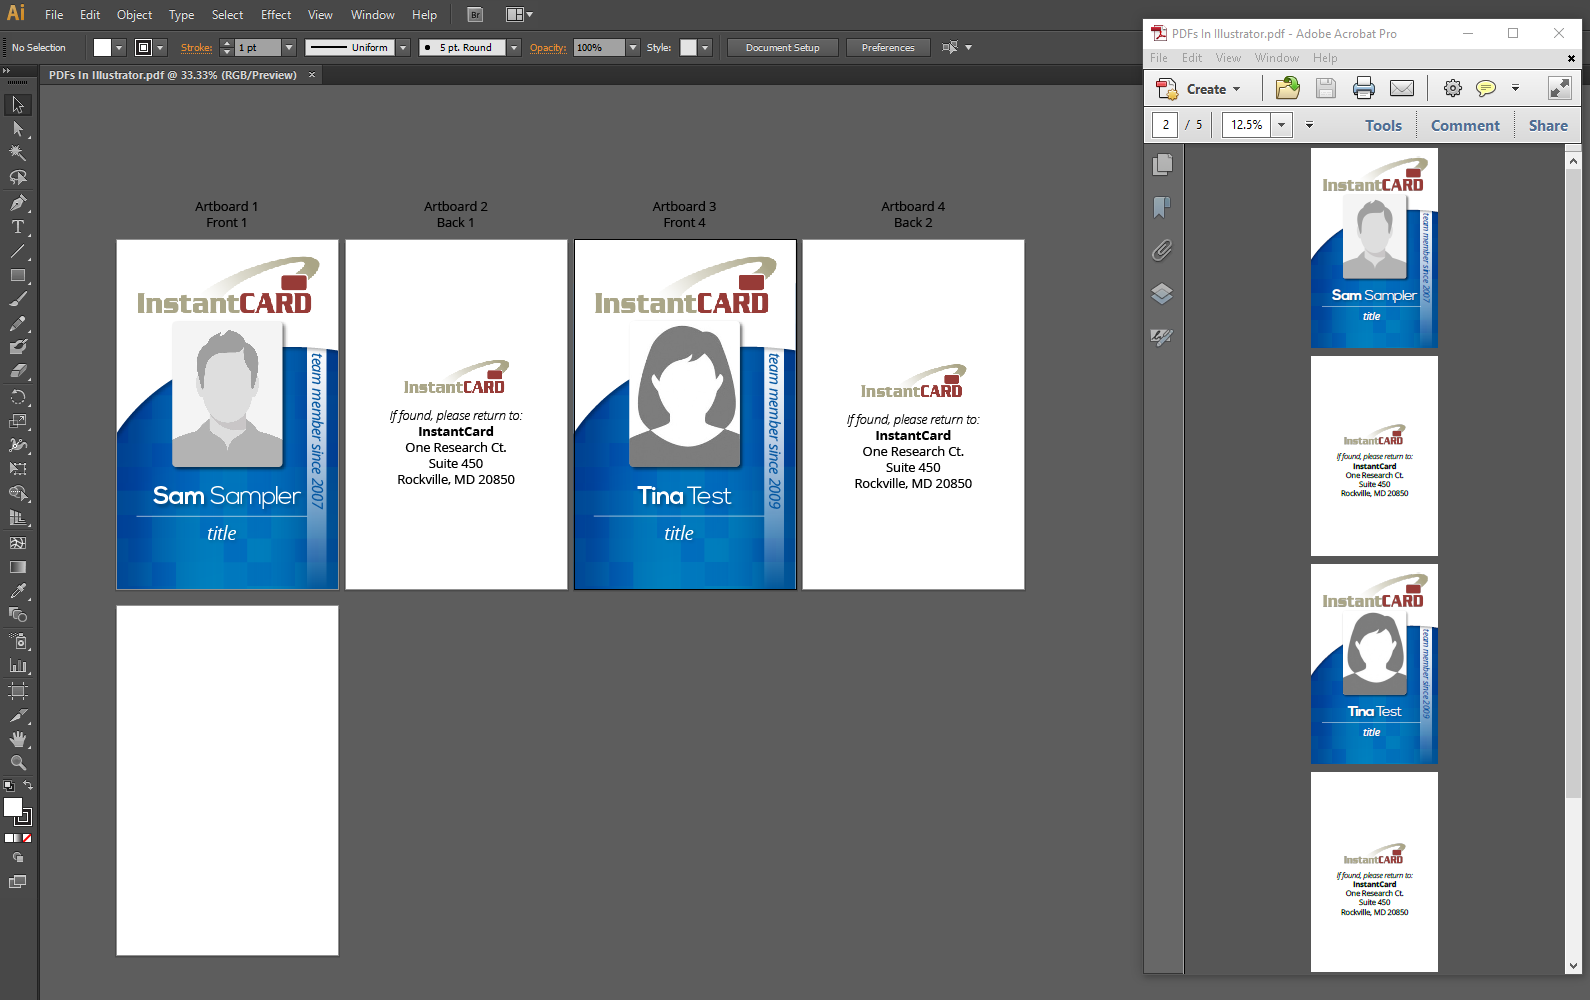
So, you’ve utilized the artboards beautifully and now you’re ready to put these things in a PDF and get them printed. I’m actually not going to tell you anything here that you won’t already know. It’s that simple! You just go to File -> Save As -> Adobe PDF. And you are done! Just hit Save PDF on the following prompt and you now have yourself a printable PDF! To prove I’m not lying take a look at the below screenshot and you’ll see that all of your artboards will now be lined appropriately when you open the PDF.
This is your designer tip for the day and I hope it helps! It’s just a faster way of creating multi-page PDFs right off the bat without extra work. Hope to see you next time!